Welcome Kubernetes Learning Group
You can use the editor on GitHub to maintain and preview the content in Markdown files.
1. Setup a single node cluster at local
There are two solutions to setup a single node cluster on Windows 10. Docker for windows(Edge) is the easiest and recommended way to get Kubernetes at local. You have to make sure your pc’s internet connection is setup correctely (has access on www.google.com is a must).
1.1 Post installation check
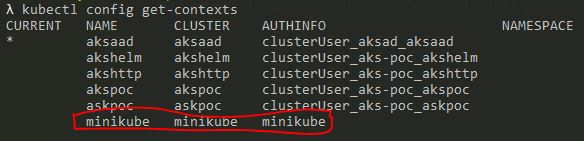
To check whether k8s is created sucessfully on you local, You could run command kubectl config get-contexts
Below is going to show on the terminal if you setup k8s with Minikube.
Below is going to show on the terminal if you setup k8s with Docker for windows. Context might be missing, to fix it you have to add C:\Users\[replace with username]\.kube\config to HOME environment variable.

1.2 Enable Dashboard
By default, you won’t get the Kubernetes Dashboard. There are two ways to install Dashboard service:
Run Command: kubectl apply -f https://raw.githubusercontent.com/kubernetes/dashboard/master/aio/deploy/recommended/kubernetes-dashboard.yaml
Or Run Command: kubectl apply -f https://raw.githubusercontent.com/kubernetes/dashboard/master/src/deploy/alternative/kubernetes-dashboard.yaml
The first approach install a dashboard service which run in secure way - requst user login. The second approach install dashboard service which is totally insecure.
Run command: kubectl proxy
Output should be as below:

If you setup dashboard service as the frist approach. You can open link https://raw.githubusercontent.com/kubernetes/dashboard/master/src/deploy/alternative/kubernetes-dashboard.yaml.
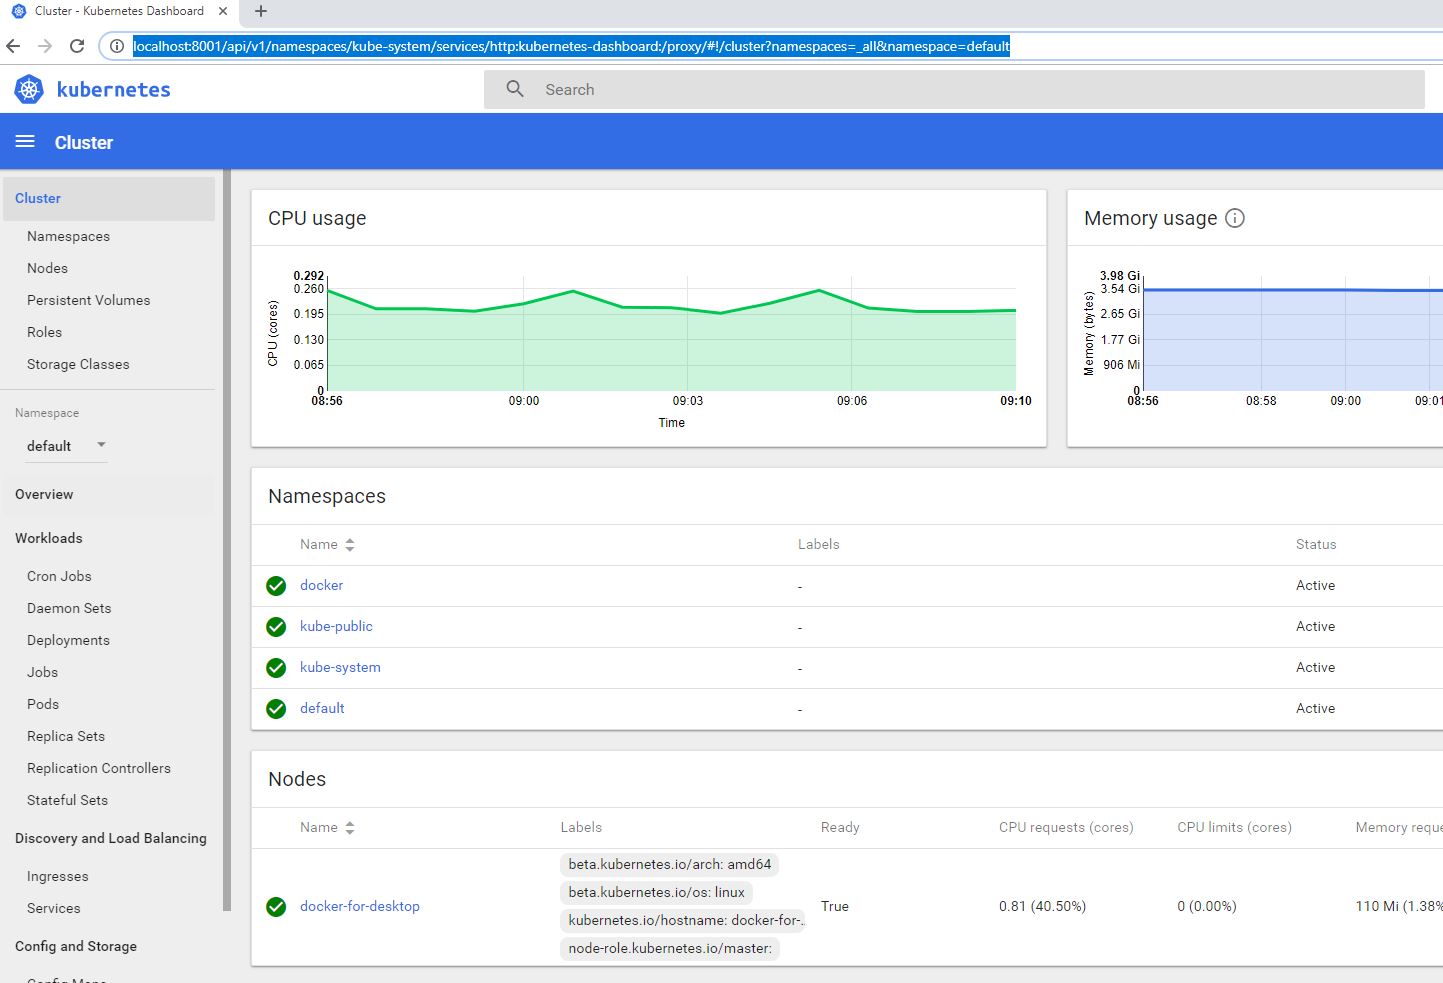
Otherwise openlink: http://localhost:8001/api/v1/namespaces/kube-system/services/http:kubernetes-dashboard:/proxy/#!/cluster?namespaces=_all&namespace=default
If you setup dashboard service as the frist approach. you may need to login as below:

To get a token:
Run Command: kubectl -n kube-system get secret
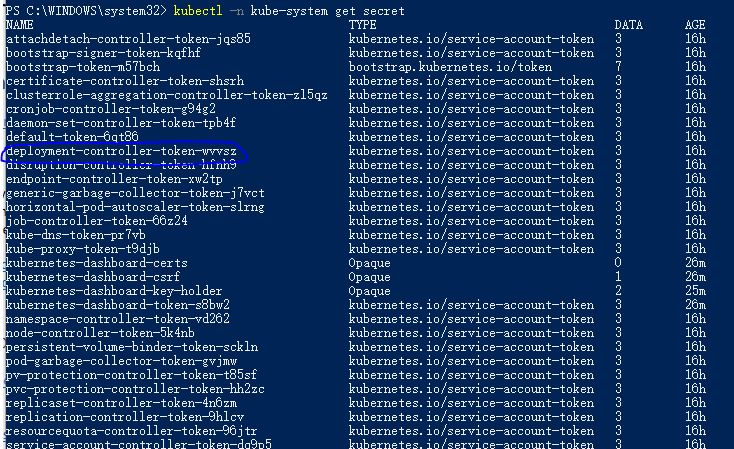
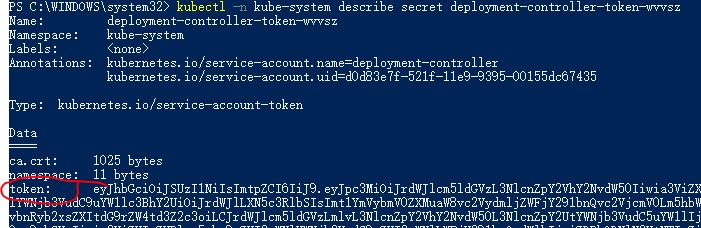
Run Command: kubectl -n kube-system describe secret deployment-controller-token-wvvsz
2. Prepare a docker image
There is a simple node app docker file. build and push it to docker repository as below. Please replace ‘yxzhk’ as your own signature registered on docker hub. source code and configuration file is located here
docker build -t yxzhk/nodeapp .
docker push yxzhk/nodeapp
3. K8s deployment
Run command: kubectl apply -f kubia-deploy.yaml

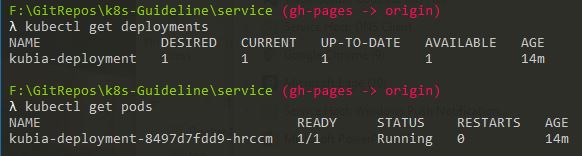
Run: kubectl get pods

Run: kubectl get deployments

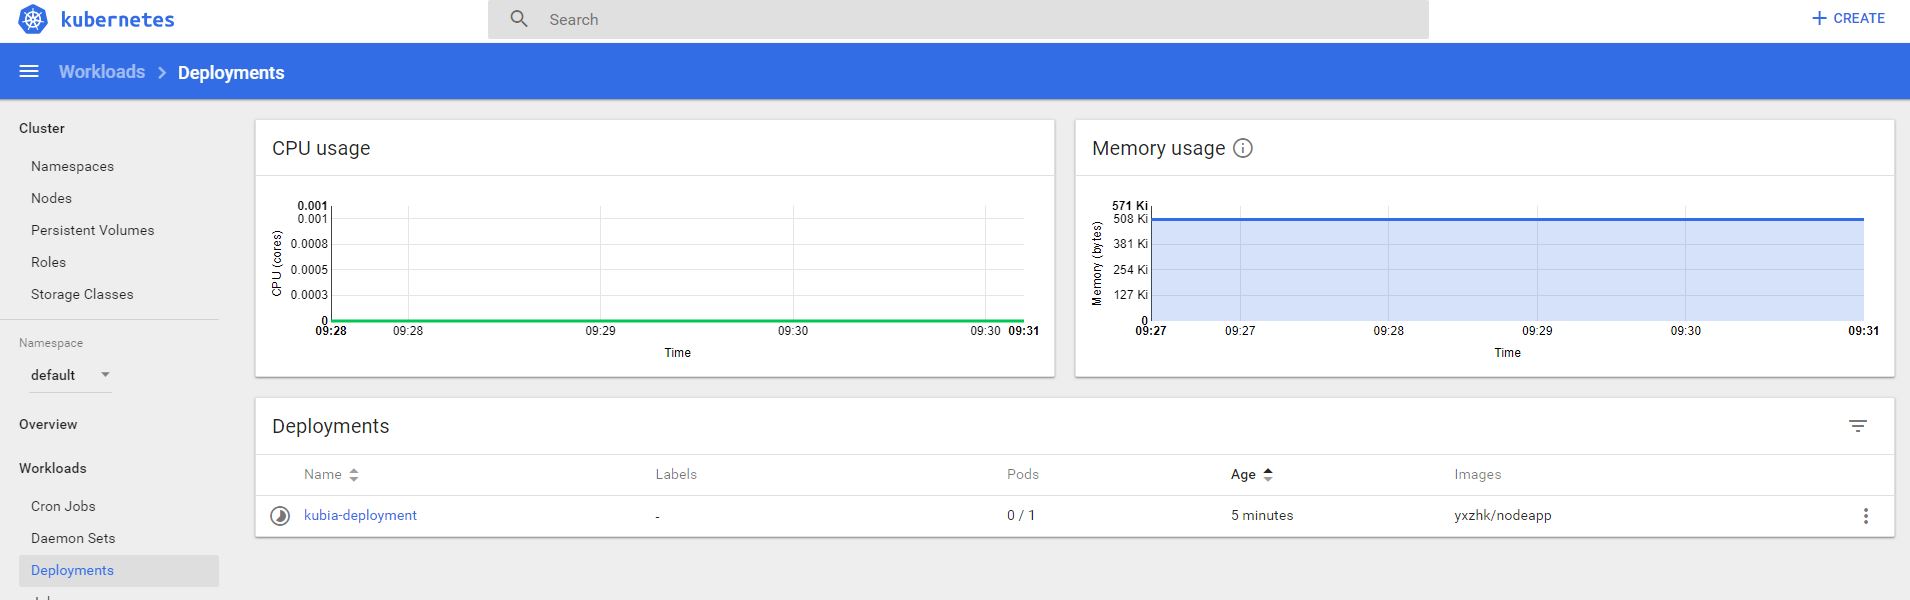
Check dashboard:
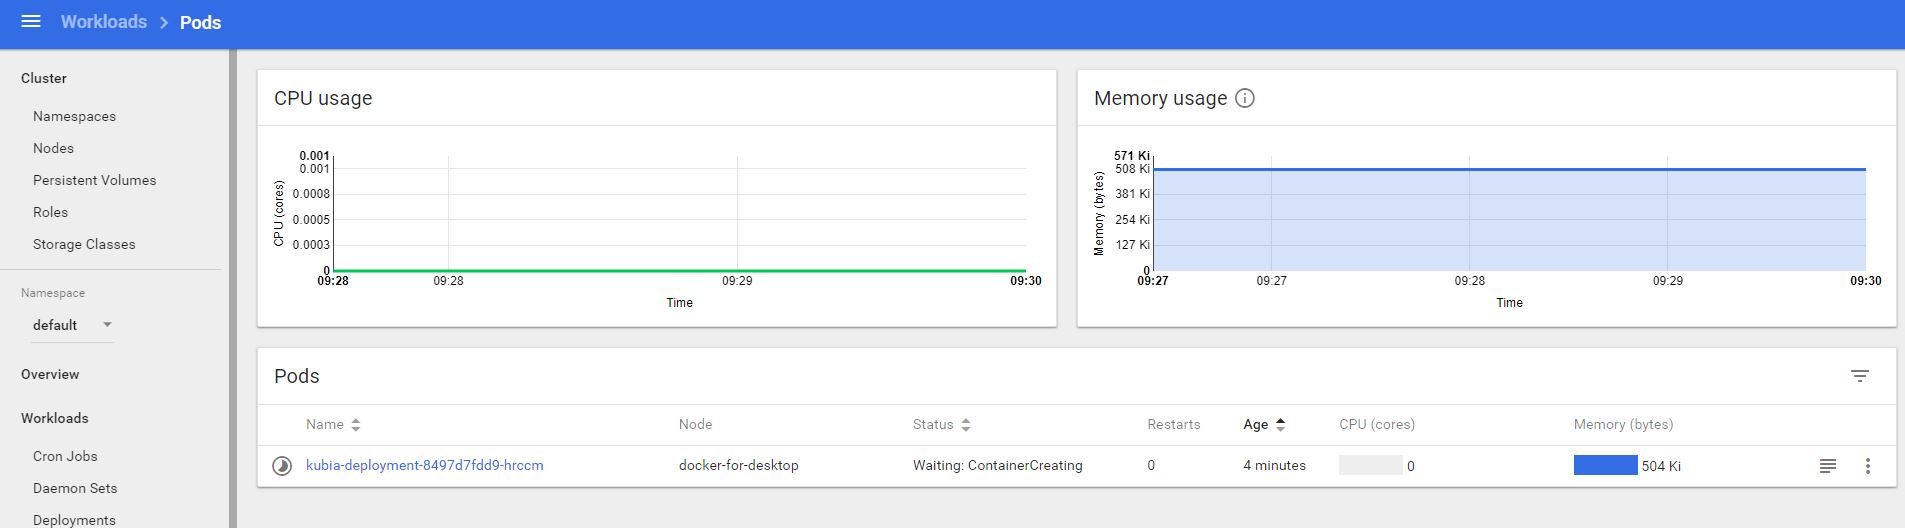
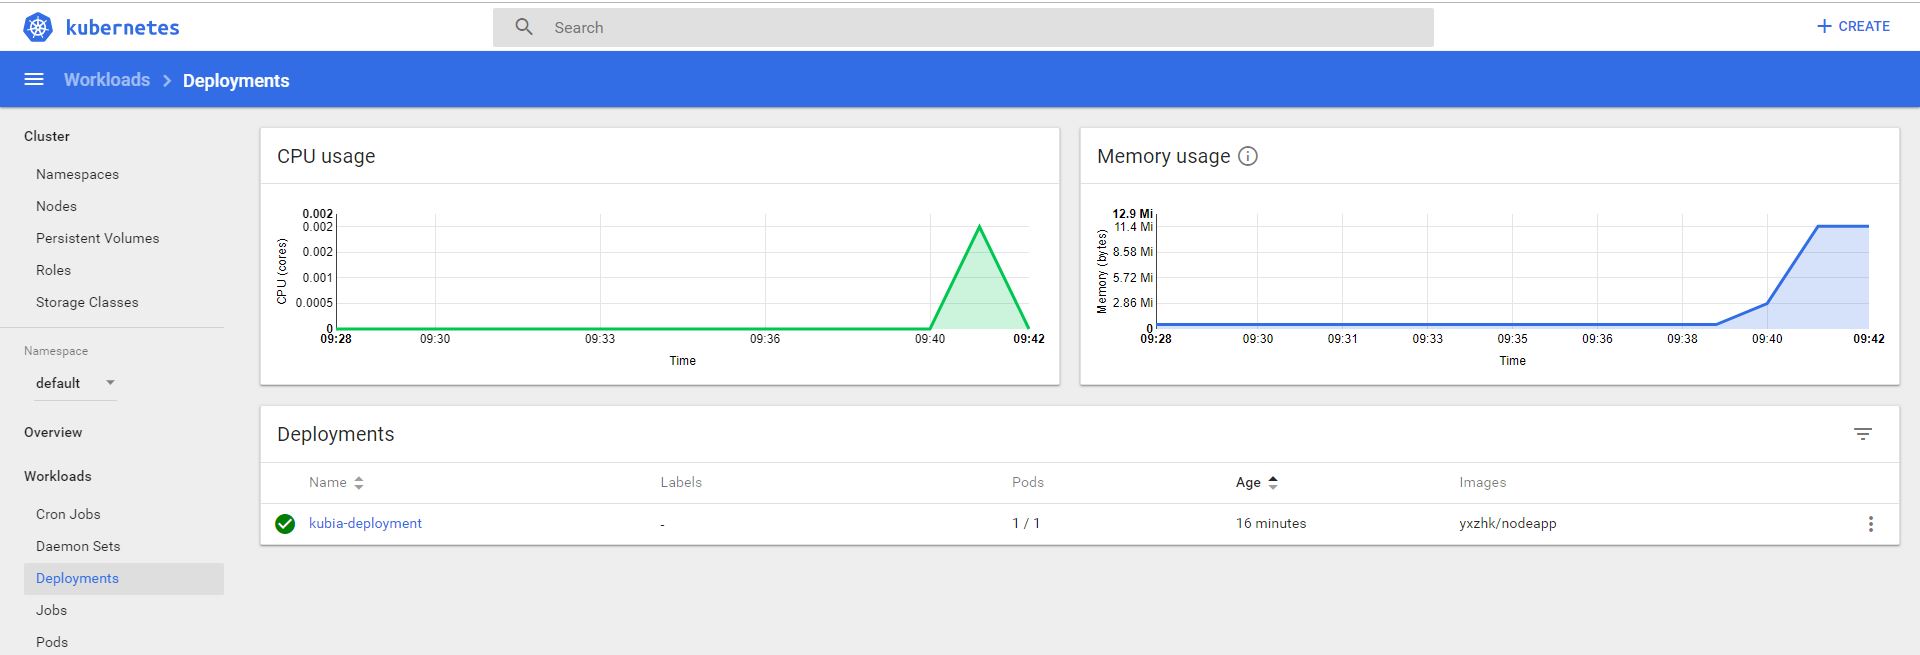
once K8s finish the deployment, check status again.

4. K8s service
4.1 Create Service
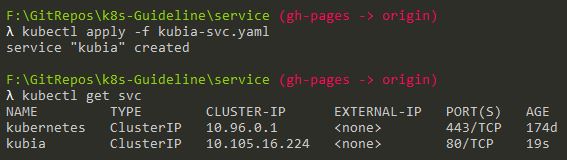
Run command: kubectl apply -f kubia-svc.yaml
Check results:

4.2 Access Service
Access service from a pod as bleow command format: Kubectl exec {pod name} – curl -s http://{service ip}
In our case, Run: Kubectl exec kubia-deployment-8497d7fdd9-hrccm -- curl -s http://10.105.16.224

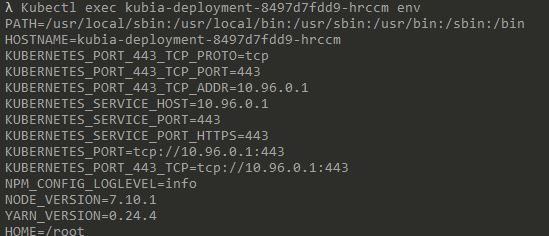
Discovering service through environment variables: kubectl exec {pod name} env
In our case, Run: Kubectl exec kubia-deployment-8497d7fdd9-hrccm env
4.3 Access Service through FDQN
Connecting to the service through its FDQN(fully qualified domain name) servicename.default.svc.cluster.local
Run Command: kubectl exec -it kubia-deployment-8497d7fdd9-hrccm bash
Them Run: curl http://kubia.default.svc.cluster.local or
curl http://kubia.default or
curl http://kubia

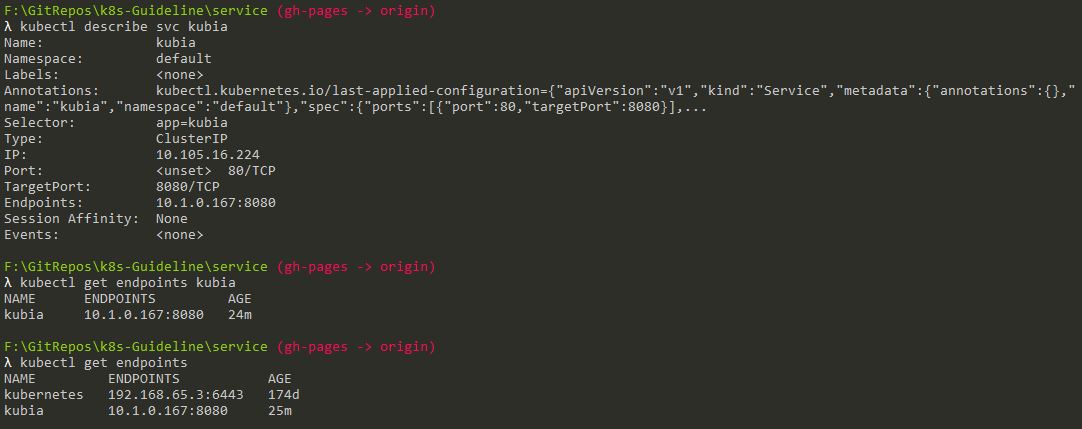
4.4 Service Endpoints
5. K8s network
Source code can be found here
Run Command: kubectl apply -f deployment.yaml
deployment “service-test” created
run: kubectl get pods
service-test-cf849786d-gm9zl 1/1 Running 0 1h
service-test-cf849786d-k2bt7 1/1 Running 0 1h
run: kubectl get pods --selector=app=service_test_pod -o jsonpath='{.items[*].status.podIP}'
10.1.0.39 10.1.0.37
update podclient.yaml with one of above IP address.
run: kubectl apply -f podclient.yaml
pod “service-test-client1” created
run kubectl logs service-test-client1
HTTP/1.0 200 OK
Server: SimpleHTTP/0.6 Python/2.7.15
Date: Sun, 02 Dec 2018 01:39:12 GMT
Content-type: text/html
Content-Length: 47
Last-Modified: Sun, 02 Dec 2018 01:11:11 GMT
<p>Hello from service-test-cf849786d-k2bt7</p>
run kubectl apply -f service.yaml
service “service-test” created
run kubectl get service service-test
NAME TYPE CLUSTER-IP EXTERNAL-IP PORT(S) AGE
service-test ClusterIP 10.107.143.159<none>80/TCP 1m
run kubectl apply -f serviceclient.yaml
pod “service-test-client2” created
run kubectl logs service-test-client2
HTTP/1.0 200 OK
Server: SimpleHTTP/0.6 Python/2.7.15
Date: Sun, 02 Dec 2018 01:46:41 GMT
Content-type: text/html
Content-Length: 47
Last-Modified: Sun, 02 Dec 2018 01:11:11 GMT
<p>Hello from service-test-cf849786d-k2bt7</p>
run kubectl describe services service-test
Name: service-test
Namespace: default
Labels:<none>
Annotations: kubectl.kubernetes.io/last-applied-configuration={“apiVersion”:”v1”,”kind”:”Service”,”metadata”:{“ann otations”:{},”name”:”service-test”,”namespace”:”default”},”spec”:{“ports”:[{“port”:80,”targetPort”:…
Selector: app=service_test_pod
Type: ClusterIP
IP: 10.107.143.159
Port:<unset>80/TCP
TargetPort: http/TCP
Endpoints: 10.1.0.37:8080,10.1.0.39:8080
Session Affinity: None
Events:<none>
run kubectl apply -f serviceNodePort.yaml
run kubectl apply -f serviceLoadbalancer.yaml
run kubectl get service
| NAME | TYPE | CLUSTER-IP | EXTERNAL-IP | PORT(S) | AGE |
|---|---|---|---|---|---|
| kubernetes | ClusterIP | 10.96.0.1 | <none> |
443/TCP | 167 |
| service-test | ClusterIP | 10.107.143.159 | <none> |
80/TCP | 12m |
| service-test-b | LoadBalancer | 10.98.53.84 | <pending> |
80:32005/TCP | 1m |
| service-test-np | NodePort | 10.110.44.244 | <none> |
80:31389/TCP | 1m |